Ultimate Drip Tape Buying Guide: How to Choose the Right One for Your Irrigation Needs
What is Drip Tape?
Drip tape is a thin-walled, flat hose that "inflates" when filled with water. It has precisely spaced emitters (small holes) that deliver a slow, steady trickle of water directly to the root zone of your plants. Unlike soaker hoses, it's designed for seasonal use in agricultural and large-scale gardening, offering an incredibly efficient and cost-effective way to irrigate.
Why Choose Drip Tape?
Key Benefits:
Superior Water Efficiency: Reduces water usage by up to 70% compared to sprinklers by eliminating evaporation and runoff.
Healthier Plants: Delivers water directly to the roots, keeping foliage dry and preventing fungal diseases.
Weed Suppression: Since only the plant rows are watered, the areas between rows stay dry, discouraging weed growth.
Fuel Plant Growth: Can be used for precise fertilizer application (fertigation), feeding nutrients directly to the roots.
Saves Timeaves Time and Labor: Once installed, the system automates watering, freeing you up for other tasks.
Step-by-Step Guide to Using Drip Tape
Step 1: Planning Your System
Before you buy any parts, create a simple sketch of your field or garden.
Measure: Determine the length of your planting rows.
Water Source & Pressure: Identify your water source (faucet, well pump) and ensure you have a pressure regulator. Drip tape typically operates at 8-12 PSI.
Mainline Hose: This is the larger, sturdy hose that carries water from the source along the head of your rows.
Row Spacing: Plan the distance between your rows of tape based on your crop layout.
Step 2: Gathering Your Components
You will need:
Drip Tape (choose emitter spacing: 4", 8", 12" based on based on crop density)
Mainline Tubing (½" or ¾")
Pressure Regulator (essential for tape longevity)
Water Filter (prevents clogging from sediment)
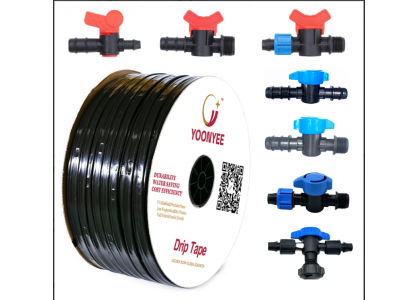
End Fittings, Elbows, and Tees
Hole Punch Tool
Barbed Connectors (to connect tape to mainline)
Step 3: Installation Process
Lay the Mainline: Place your mainline tubing perpendicular to your planned crop rows. Secure it Secure it to the ground with stakes.
Install the Filter and Regulator: Connect the filter and pressure regulator to your water source before the mainline. This protects your entire system.
Punch Holes and Add Connectors: Use the hole punch to make a hole in the mainline where each row of drip tape will start. Insert a barbed connector into each hole.
Lay the Drip Tape: Unroll the drip tape along each plant row. Connect the start of the tape to the barbed connector. Ensure the emitters are facing upwards. This prevents sediment from settling inside the emitters when the system is off.
Close the Ends: At the end of each row, fold the tape over about 2-3 times and secure it with a tight clamp, a figure-8 knot, or a manufactured end cap.
Step 4: Operation and Maintenance
Flushing the System: Before your first use and periodically throughout the season, open the ends of the drip tape lines and flush them for a minute a minute to clear any debris.
Running Time: Watering duration depends on your soil type, crop, and weather. A good starting point is 30-60 minutes. Check soil moisture 3-4 inches deep to adjust.
Regular Inspection: Check for leaks, kinks, or damage or damage from insects or tools regularly.
Step 5: Winterization and Storage
At the end of the season:
Completely drain the entire system.
Disconnect the drip tape from the mainline.
Flush the tape thoroughly with clean water.
Allow it to dry completely before rolling it up for storage. This prevents mildew and degradation.
Troubleshooting Common Drip Tape Issues:
Problem: Uneven Watering
Cause: Clogged emitters, low water pressure, or a sloped field.
Fix: Flush the system, check pressure regulator, and consider pressure-compensating tape for slopes.
Problem: Leaks or Bursts
Cause: Pressure too high, damage from animals or cultivation tools.
Fix: Ensure your pressure regulator is functioning. Repair Repair sections with couplers or replace damaged tape.
Problem: Water Not Coming Out
Cause: Closed valve, clogged filter, or a kink in the in the line.
Fix: Check all valves, clean the filter, and walk the lines to find and remove kinks.
Drip Tape vs Drip Tubing: Which is Right for You?
| Feature |
Drip Tape |
Drip Tubing |
| Wall Thickness |
Thin (4-15 mil) |
Thick (15-30+ mil) |
| Durability |
Seasonal, single-season |
Multi-year, permanent |
| Cost |
Very Cost-Effective |
More Expensive |
| Best For |
Large vegetable gardens, row crops, seasonal farms |
Orchards, vineyards, perennial beds, landscapes |
Final Tips for Success
- Always use a filter and pressure regulator. They are non-negotiable for protecting your investment.
- For long rows (>200 ft), consider installing the tape down the center of a double crop row or using a larger mainline to maintain even pressure.
- Pair your drip tape with a timer for fully automated, worry-free irrigation.
By following this guide, you can set up a highly efficient drip tape system that conserves water, boosts plant health, and maximizes your garden's productivity.